
Prerequisites
Before setting up Loop Tracking integration, ensure the following:
- You have an active Loop Tracking account and a Loop API Access Token
- You are signed up for a Reactiv Plan.
- Your Reactiv Mobile App is already set up and functioning.
Step 1: Access the Integrations Page
- Log in to your Shopify admin dashboard.
- In the left-hand menu, locate Reactiv - Mobile App Builder under the "Sales channels" section.
- Click on Reactiv - Mobile App Builder to open the Reactiv dashboard.
- Select Integrations from the sidebar.
Step 2: Locate Loop Tracking
- On the Integrations page, use the search bar or scroll to find Loop Tracking using the search bar.
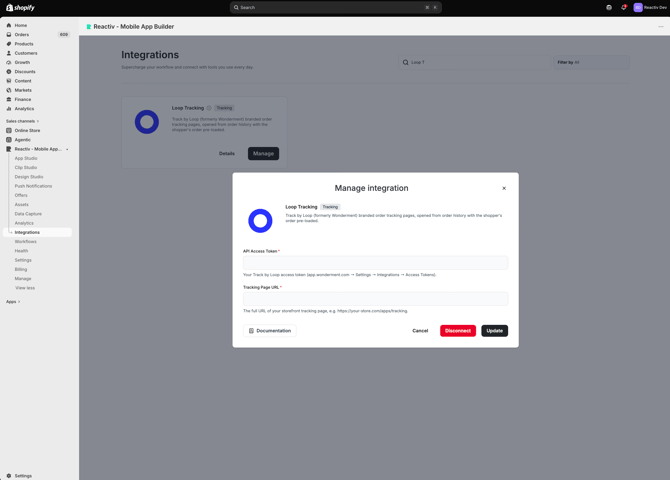
- Click the Connect button next to Loop Track to access the integration settings.
Step 3: Connect Loop Tracking to Your Mobile App
- In the Loop Tracking integration popup, you will see a field for the App Access Token.
- Obtain your API Access Token from your Loop Account (app.wonderment.com → Settings → Integrations → Access Tokens).
- Paste the API Access Token into the API Access Token field in the Reactiv integration popup.
- Enter your Tracking Page URL. This is the full URL of your storefront tracking page, e.g. https://your-store.com/apps/tracking.
- Click Update/Connect and Loop Tracking will be connected to Reactiv.

Step 4: Set Loop Tracking as the Tracking provider
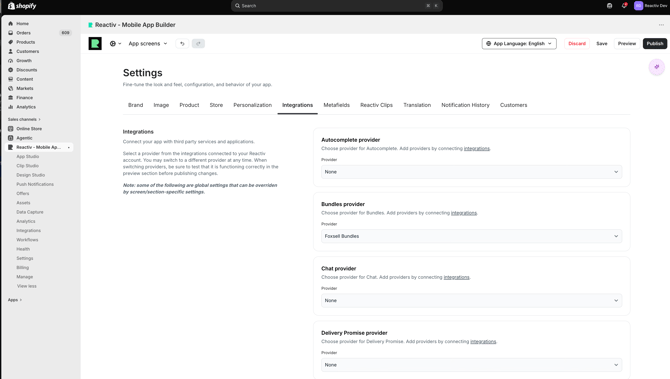
- On the Reactiv Dashboard, navigate to Settings then click on the Integrations tab.
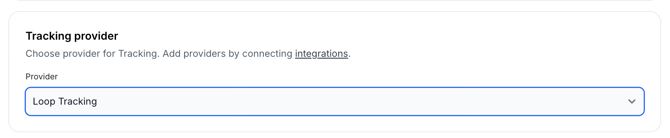
- Set Loop Tracking as the Tracking provider and Save
Step 5: Verify the Integration
- Before publishing your app update, thoroughly test the Loop Tracking integration in the preview app.
- Ensure that a track order button appears on all eligible orders in the App Order History Screen.
Troubleshooting
If you encounter issues during the setup, please contact our support team via chat or email.
📝 Always save and publish your work in the dashboard before checking the mobile app.