Prerequisites
Before setting up the Recharge integration, ensure the following:
-
You have an active Recharge account with active product subscriptions
-
Your Reactiv Mobile App is already set up and functioning.
Step 1: Access the Integrations Page
-
Log in to your Shopify admin dashboard.
-
In the left-hand menu, locate Reactiv - Mobile App Builder under the "Sales channels" section.
-
Click on Reactiv - Mobile App Builder to open the Reactiv dashboard.
-
Select Integrations from the sidebar.
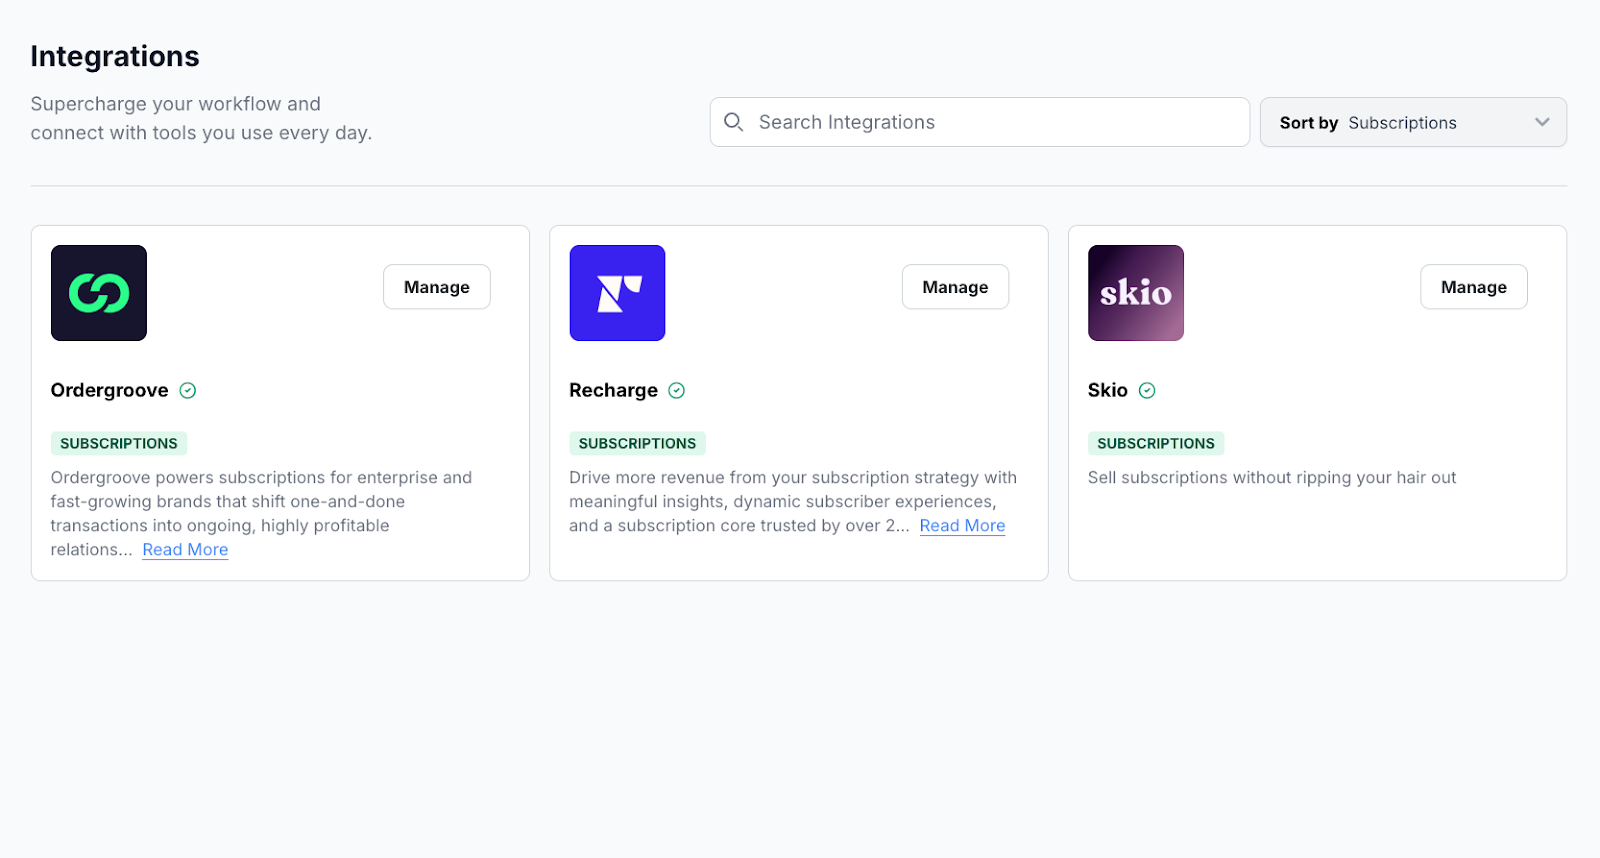
Step 2: Locate Recharge
-
On the Integrations page, use the search bar to find Recharge or use the category dropdown under "Subscriptions".
-
Click the Connect button next to Recharge to access the integration settings.
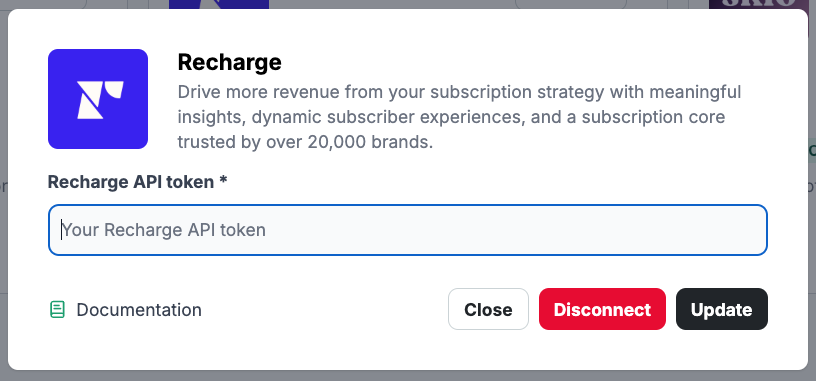
Step 3: Connect Recharge to Your Mobile App
-
In the Recharge integration popup, you will see a field for the Recharge API token
-
Obtain the necessary field
-
Paste the appropriate information within the field in the Reactiv integration popup.
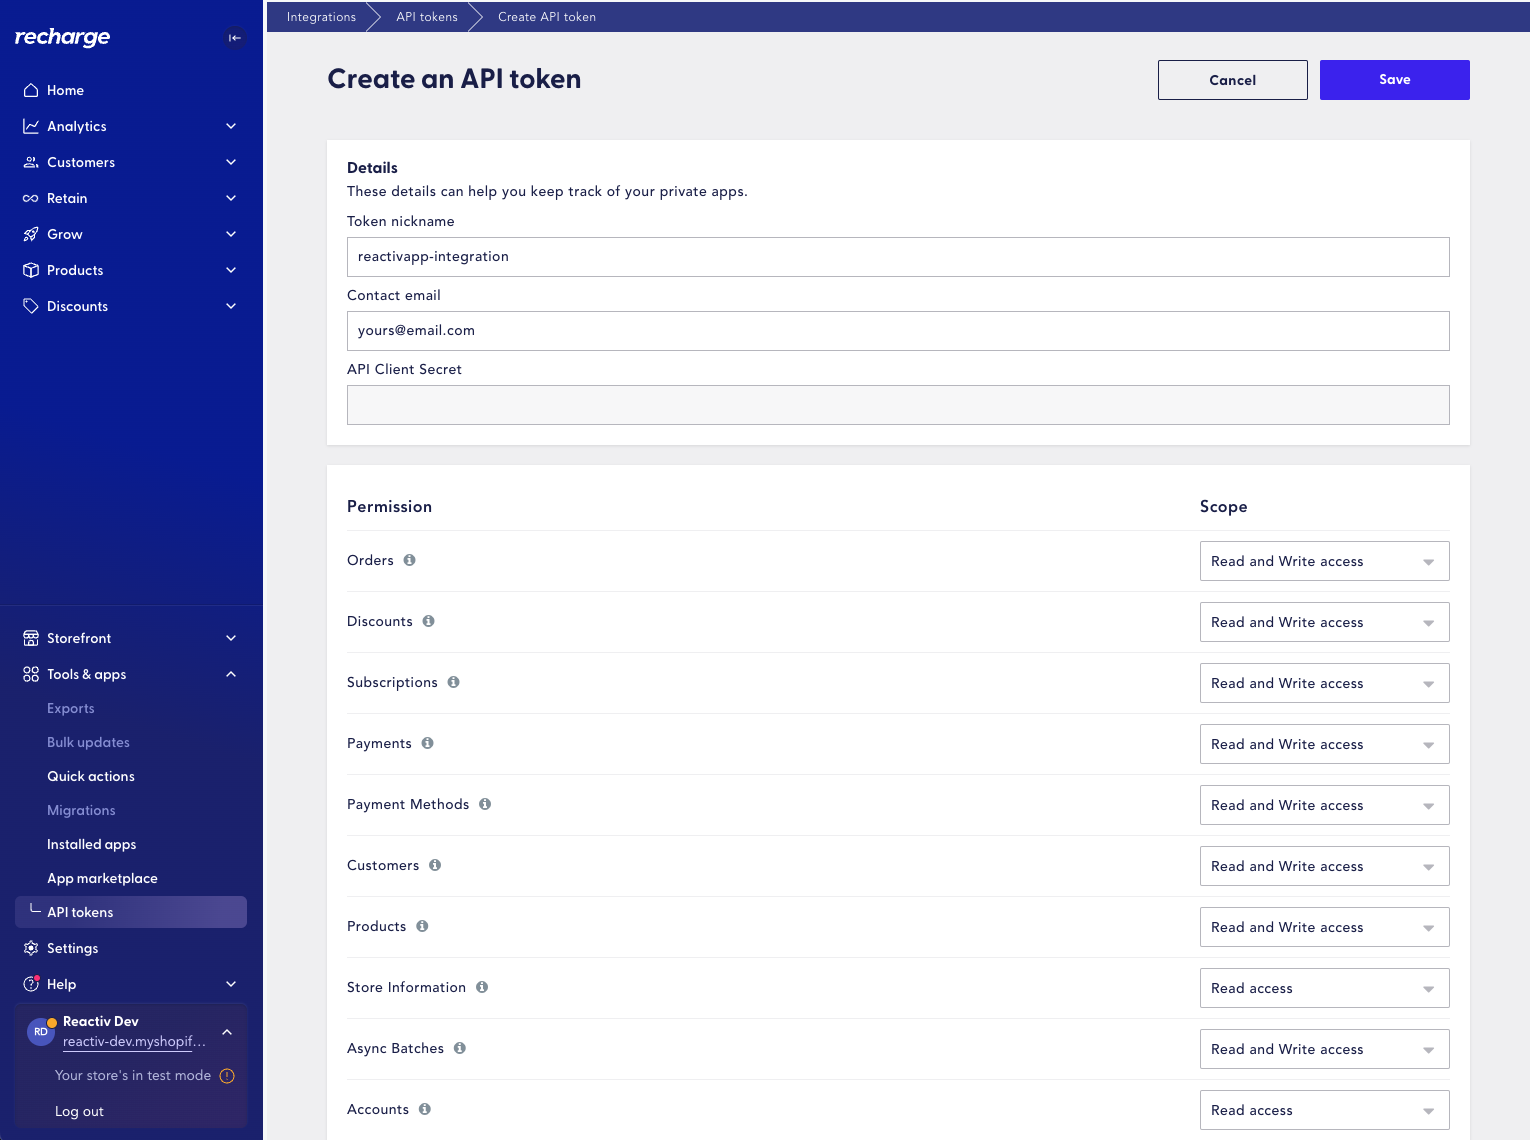
1. API token:
Generate a new API token for your Recharge account:
-
Log in to your Recharge dashboard.
-
Go to the "Tools & apps" dropdown and click on "API tokens".
-
Click "Create an API token"
-
Give your token a name e.g. reactivapp-integration
-
Enter your company email address
-
Provide the correct permissions:
-
Orders - Read and Write access
-
Discounts - Read and Write access
-
Subscriptions - Read and Write access
-
Payments - Read and Write access
-
Payment Methods - Read and Write access
-
Customers - Read and Write access
-
Products - Read and Write access
-
Store Information - Read access
-
Async Batches - Read and Write access
-
Accounts - Read access
-
-
Check the box to agree with Recharge's API Terms of Service.
-
"Save" and create your new token
Step 4: Save the Integration
-
After entering your information, click the Connect/Update button to save the integration.
-
Once saved, Recharge will be connected to Reactiv.
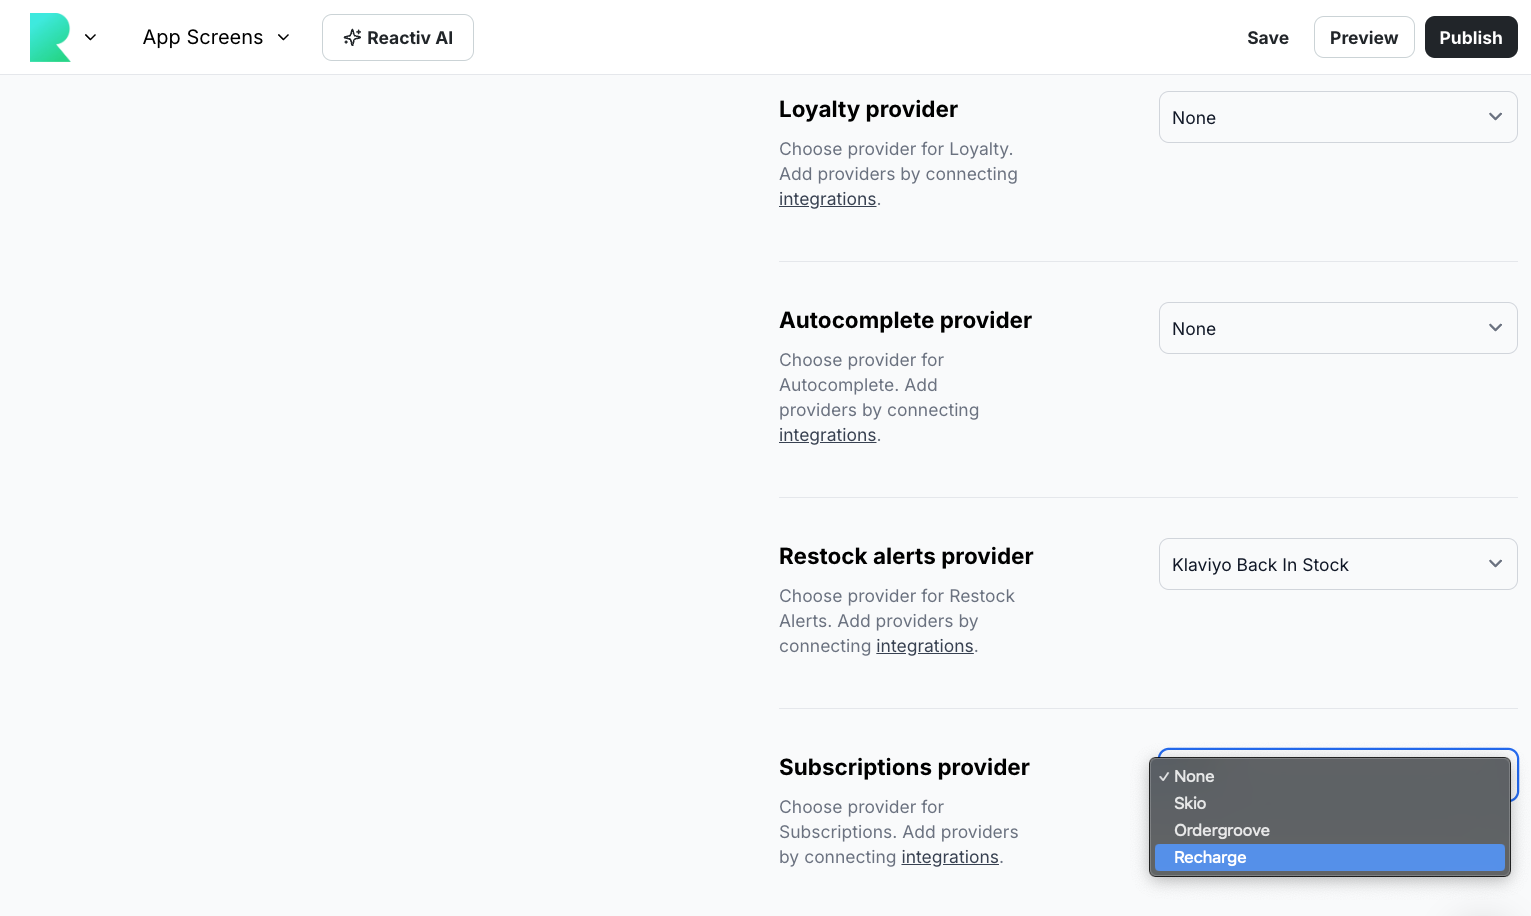
Step 5: Add Subscriptions to Mobile
-
Navigate to App Studio > Account Settings > Integrations tab
-
Scroll to the Subscriptions Provider Section
-
From the Dropdown, select Recharge
-
Once complete, click Save & Publish
Step 6: Verify the Integration
-
If any issues arise, recheck the Recharge settings and make sure to Save the settings correctly.
Limitations
-
N/A
Troubleshooting
-
Invalid Recharge API token: Ensure that you have correctly copied the Recharge API token from your Recharge dashboard.
For more detailed information on managing and customizing your subscriptions, please refer to your account manager at Recharge.