 Written by Reactiv App
Purpose:
In this guide, you’ll learn how to set up a visual content block—called a Page Interrupter—on your product listing pages (PLPs) in Reactiv. This content block lets you display an eye-catching image, title, and optional description to highlight promotions, brand messaging, or important updates right in the shopping experience.
Navigate to the Content Block Settings
-
Log in to your Shopify admin dashboard.
-
In the left-hand sidebar, scroll to the Sales Channels section.
-
Click Reactiv – Mobile App Builder, then select App Studio.
-
Click the menu icon beside your store logo, then choose Product Listing.
-
In the left-hand menu under your logo, select Settings.
-
Scroll down to the Content block section.
You’ll now see the configuration panel for the Page Interrupter.
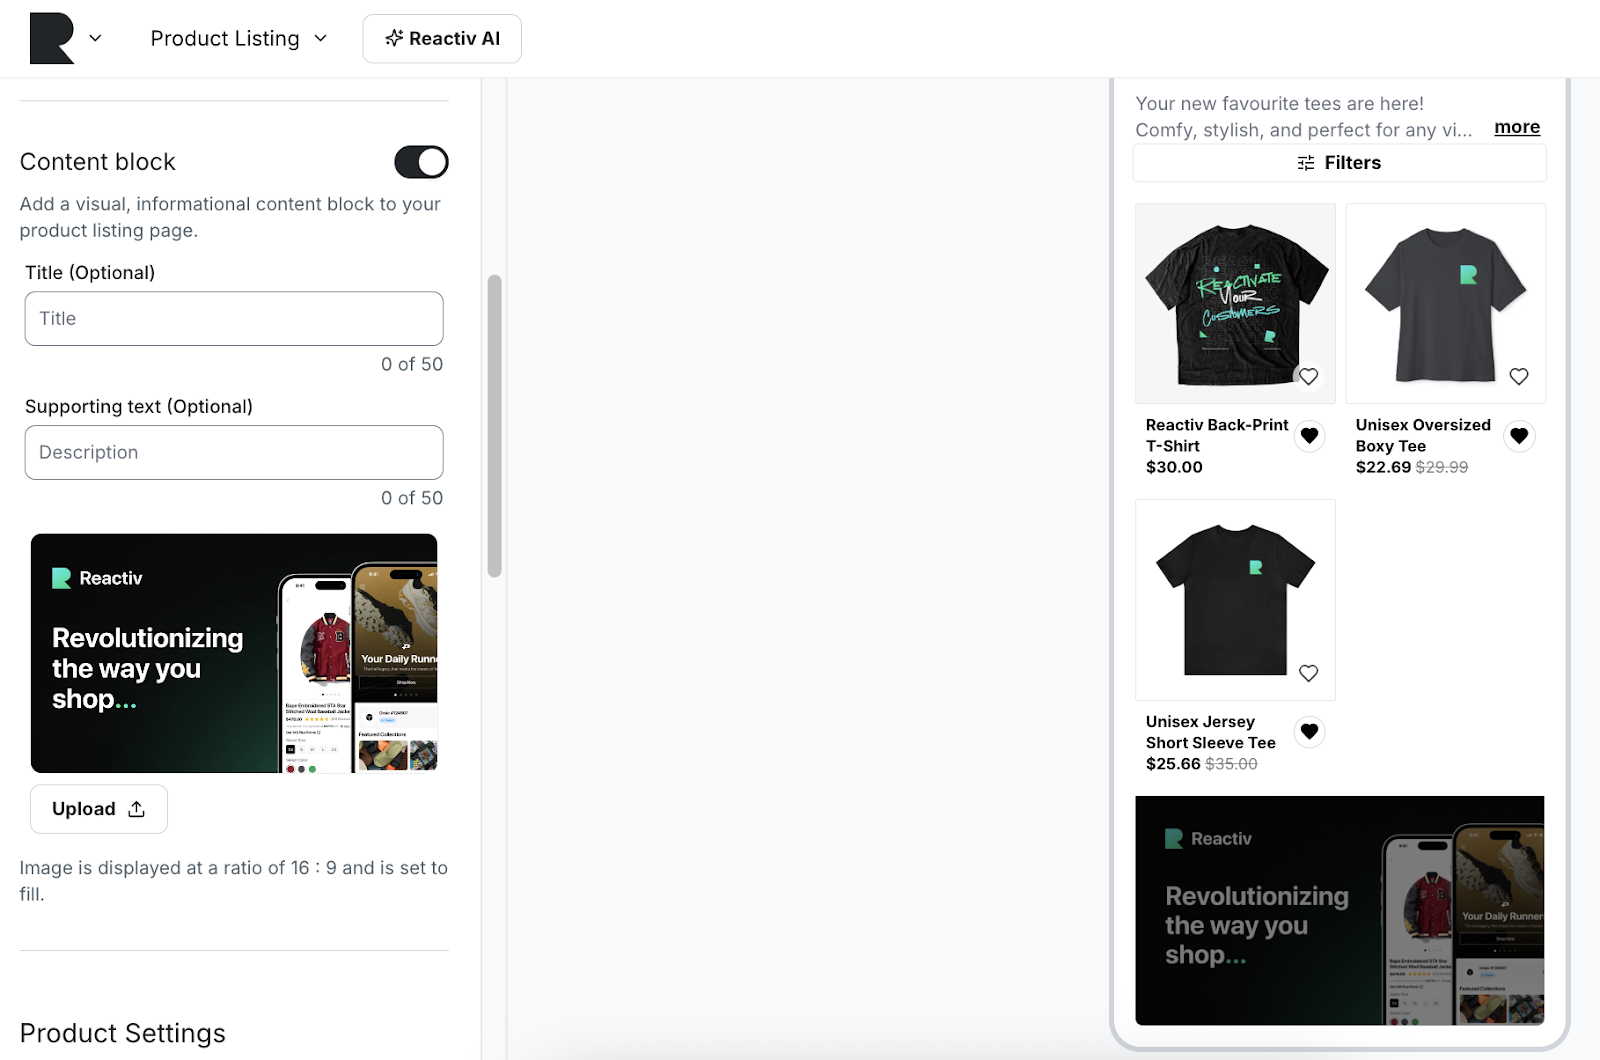
What is a Page Interrupter?
The Content block is a customizable visual section that appears within your product listing page. It’s designed to break up the page layout with a branded, promotional, or informative message—helping you capture shopper attention without disrupting their browsing.
Key Features:
-
Toggle to enable or disable the block at any time.
-
Add an optional Title (up to 50 characters).
-
Add optional Supporting text (up to 50 characters).
-
Upload a custom image in a 16:9 aspect ratio. The image automatically scales to fill the area.
How to Set Up a Content Block
-
Toggle on the Content block at the top of the section.
-
Enter a Title (optional):
This will appear as the main heading in your content block. Keep it clear and compelling.
Example: “New Collection Just Dropped!” -
Enter Supporting text (optional):
This is a short subheading that adds context or encourages action.
Example: “Check out the latest arrivals before they’re gone.” -
Upload your image:
Click the Upload button and select a 16:9 image. This image will fill the content block space and serve as the visual centerpiece.-
Recommended dimensions: 1600 × 900 pixels or similar.
-
Ensure the image aligns with your branding and fits the text you’ve entered.
-
-
Preview the result:
Your uploaded content will appear in the live preview panel so you can see how it looks before saving.

Best Practices for Page Interrupters
📸 Use high-quality visuals
Choose bold, branded imagery that aligns with your store’s aesthetic and goals.
🧠 Focus the message
Keep the title and supporting text brief and to the point. Think headline + hook.
🎯 Tie into your promotions
Use this section to promote seasonal sales, new arrivals, app downloads, or special offers.
🛠️ Keep it updated
Refresh the image and message regularly to reflect current campaigns or announcements.